
Setting up a Qdrant client for .NET
Setting up a local qdrant server using the qdrant-dotnet library
 Yash Worlikar Mon Jan 01 2024 6 min read
 IMPORTANT: The dotnet-client library uses the gRPC client internally to communicate with the qdrant server. The gRPC APIs for Qdrant are still under development and not ready for production builds. This blog is meant to be informative for testing and internal use only.
Introduction
Qdrant is a popular open-source vector database for storing, searching, and managing vectors. It’s written in rust so it’s highly reliant and it is specifically designed for applications that are reliant on vector searches such as image search, similarity search, and anomaly detection.
While Qdrant provides us with both the gRPC and REST API, the qdrant-dotnet client library internally uses the gRPC API internally to communicate with the server.
This blog is written to walk you through the setup of a local Qdrant instance using Docker, configuring secure connections via TLS/SSL, and interfacing with the Qdrant server using the qdrant-dotnet client library.
Running the Qdrant server locally
Pre-requisites:
- Docker (Getting Started)
- dotnet SDK
- Visual Studio or VS code
IMPORTANT - Please ensure that the docker is running before starting
Open up PowerShell and pull the latest Qdrant image from DockerHub
docker pull qdrant/qdrant
Once the image is successfully downloaded, use the following command to start the qdrant server
docker run -p 6333:6333 qdrant/qdrant
If set up correctly we will see the following messages and now can access the server dashboard using http://localhost:6333/dashboard.
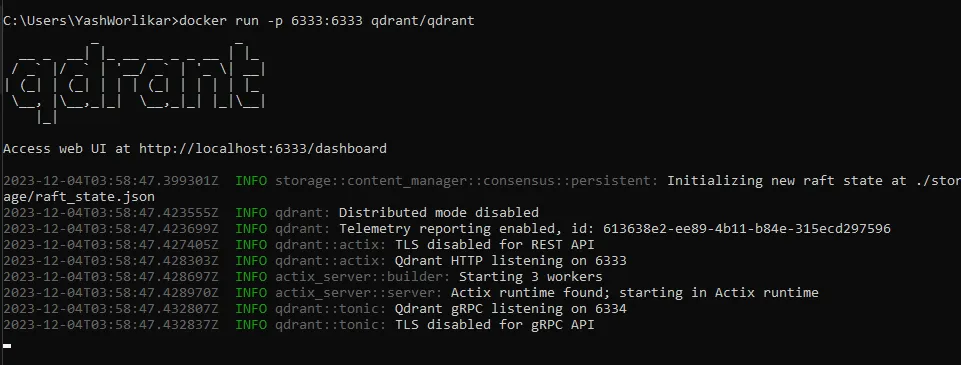
Great now we can communicate with the server using REST calls but only using the http endpoint.
For interacting with qdrant using dotnet we have multiple choices
- use the official qdrant-dotnet client library that uses the gRPC client
- use the semantic-kernel qdrant package that provides a REST client implementation
- implement custom clients for REST or gRPC API or both together
Here I will be using the qdrant-dotnet library so before using the qdrant server, we will be setting up certain things including
- A Persistent storage for the server
- A custom configuration file
- A valid SSL certificate for using HTTPS connection and the gRPC client (required for .NET framework)
Note that while it is possible to use the qdrant-dotnet library with the framework projects, the .NET framework has limited support for gRPC requiring the WinHttpHandler package for setting up an Http/2 connection along with a TLS connection.
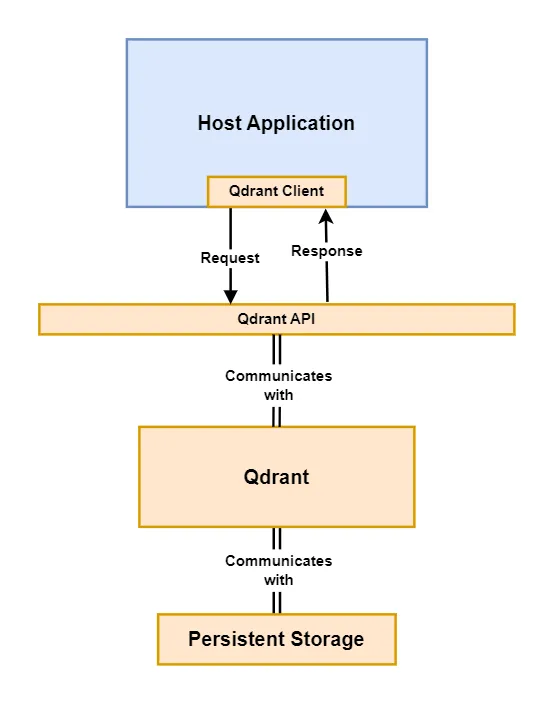
Here’s a high-level overview of using a single qdrant instance within a host application:
Setting up certs and enabling TLS for the server (Optional for .NET core)
- Create the directory that will contain the files required for qdrant
mkdir qdrant/config
-
Download the reference config file from the qdrant GitHub repo and move the file to the config folder https://github.com/qdrant/qdrant/blob/master/config/config.yaml
-
Open the config file and set enable_tls to true
# Enable HTTPS for the REST and gRPC API
enable_tls: true
- Optionally we can also set an API key for the server
  # Uncomment to enable.
  api_key: <Your custom API key>
Now that we have the config file set, we will generate the SSL certificates in the qdrant/certs folder
Generate the Self-signed certificate for the qdrant server for the development environment.
dotnet dev-certs https -ep ${PWD}/qdrant/certs/cert.pem --trust --format PEM --no-password
This should generate two files namely cert.pem containing the certificate and key.pem containing the key.
If set up correctly your folder structure should look like this
qdrant
|-config
|   |-config.yaml
|-certs
|   |-cert.pem
|   |-cert.key
Running qdrant container with SSL enabled
Run the following command in PowerShell (Note that you only need to run this command once to create the container)
docker run -p 6333:6333 -p 6334:6334 `
    -v ${PWD}/qdrant/config/config.yaml:/qdrant/config/custom_config.yaml `
	-v ${PWD}/qdrant/certs/cert.pem:/qdrant/tls/cert.pem `
	-v ${PWD}/qdrant/certs/cert.key:/qdrant/tls/key.pem `
	-v ${PWD}/qdrant/qdrant_storage:/qdrant/storage `
    qdrant/qdrant ./qdrant --config-path /qdrant/config/custom_config.yaml
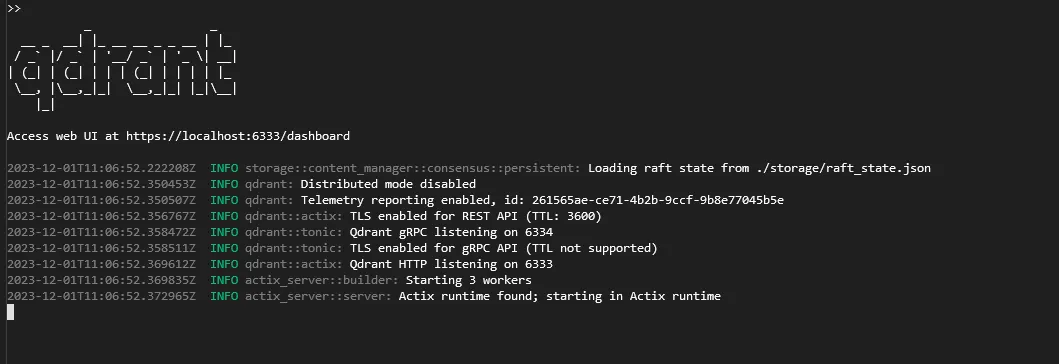
We will be providing the config.yaml as custom_config.yaml and cert files to our container and creating a persistent storage for the server.
You can reuse the container by using the docker desktop app or by getting the container ID in the CLI
docker container ls -a
and start it using
docker start <container-id>
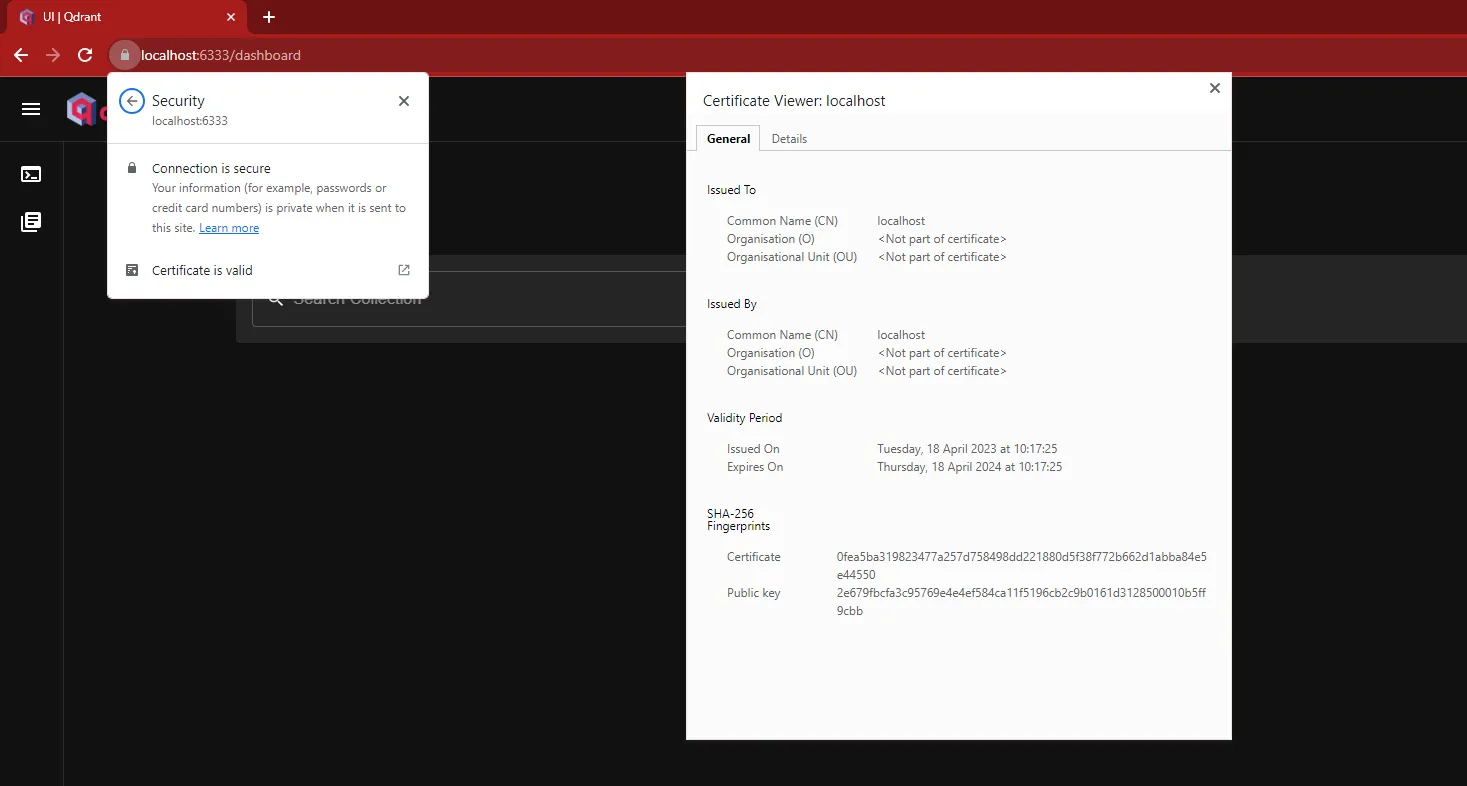
Check the https://localhost:6333/dashboard to make sure that the https connection is working.
Note: If you also using the qdrant-dotnet library with the .NET framework make sure to note down the SHA-256 certificate fingerprint since we will require it for connecting the gRPC client using qdrant-dotnet library in our host app.
Using the qdrant-dotnet Client library
An example of how we communicate with the qdrant server using the high-level QdrantClient class.
var channel = QdrantChannel.ForAddress("https://localhost:6334",
	new ClientConfiguration
	{
		ApiKey= "<Your API key set for the qdrant server in the config file. Ignore if not set>",
		CertificateThumbprint = "<SHA256 thumbprint of your ssl certificate>",
	}
  );
var _grpcClient = new QdrantGrpcClient(channel);
var _client = new QdrantClient(_grpcClient);
This implementation only works for .NET core and higher versions. For the .NET framework, the following are required
- set qdrant to use TLS in config and use HTTPS with a valid SSL certificate
- using the
System.Net.Http.WinHttpHandler>= 6.0.1 nuget package
var channel = GrpcChannel.ForAddress("https://localhost:6334", new GrpcChannelOptions
{
  HttpHandler = new WinHttpHandler
  {
    ServerCertificateValidationCallback =
      CertificateValidation.Thumbprint("<SHA256 thumbprint of your ssl certificate> Required for https")
  }
});
var callInvoker = channel.Intercept(metadata =>
{
  metadata.Add("API-key", "<Your API key set for the qdrant server in the config file. Ignore if not set>");
  return metadata;
});

var _grpcClient = new QdrantGrpcClient(callInvoker);
var _client = new QdrantClient(_grpcClient);
After creating the client we can interact with the databases using the available high-level methods
through QdrantClient or we could use the QdrantGrpcClient directly to call the lower-level methods
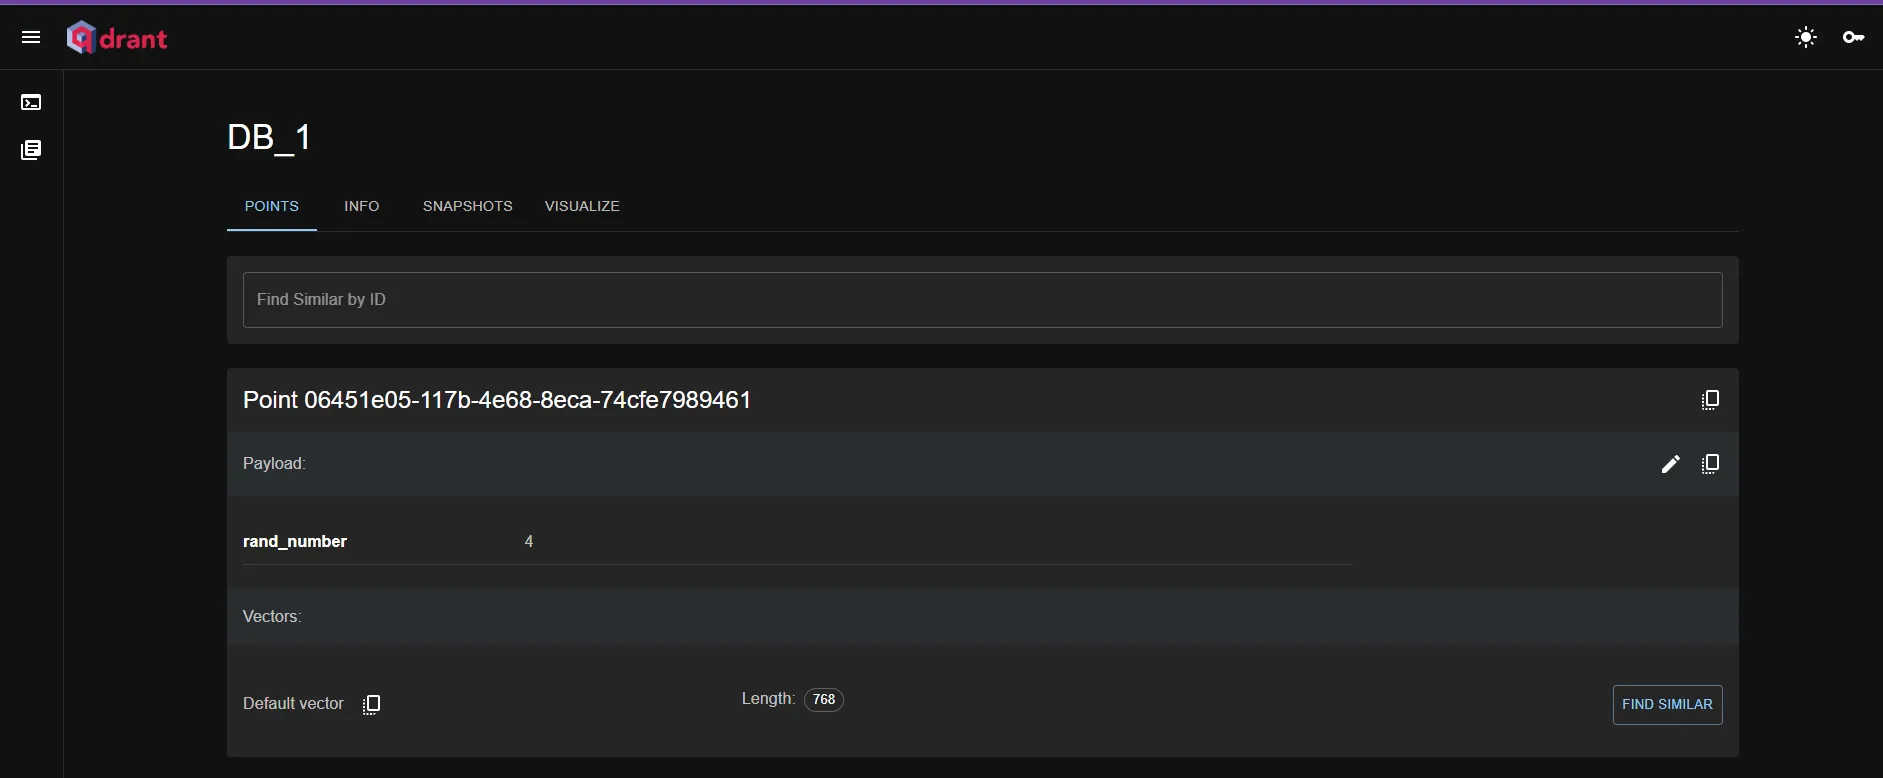
An example interacting with the Qdrant server using our gRPC Client. Here we are creating a collection named “DB_1” and inserting 100 randomly generated points in the server
        public async Task GenerateData()
        {
			string collectionName = "DB_1";
			//Create a collection named DB_1 with a size of 768 dimensions and Cosine distance
			await _client.CreateCollectionAsync(collectionName, new VectorParams { Size = 768, Distance = Distance.Cosine });
            // generate some vectors
            string[] colors = { "red", "blue", "green", "yellow", "orange", "purple" };
            var random = new Random();
            var points = Enumerable.Range(1, 100).Select(i => new PointStruct
            {
                Id = new PointId { Num = (ulong)i, Uuid = Guid.NewGuid().ToString() },
                Vectors = Enumerable.Range(1, 768).Select(_ => (float)random.NextDouble()).ToArray(),
                Payload = {
                      ["random number"] = i % 10,
					  ["color"] = colors[random.Next(0, colors.Length)]
                         }
            }).ToList();

	         /// Insert the 100 generated points in the collection
			await _client.UpsertAsync(collectionName, points);
        }
We can see the inserted database through the qdrant dashboard available at “localhost:6333/dashboard” either http or https based on your setting.
Wrapping up
In this blog, we’ve covered the fundamental steps required to set up a local instance of Qdrant using Docker, establish secure connections using TLS/SSL, and interact with the Qdrant server using the qdrant-dotnet client library.
Check out the official qdrant repo && the qdrant-dotnet repo for latest update.
For additional information, feel free to explore these blogs as well.